Thursday, March 27, 2025

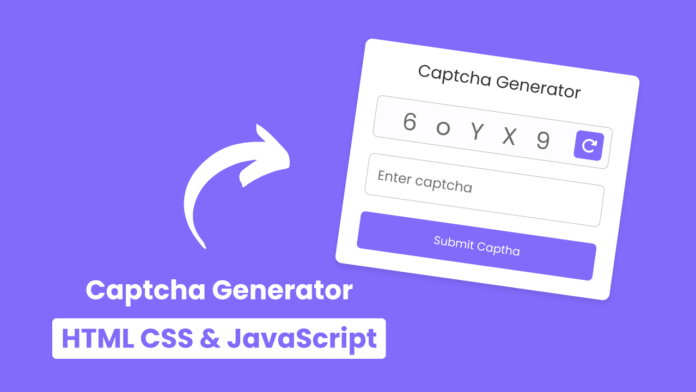
কিভাবে HTML CSS & JAVASCRIPT দিয়ে তৈরি করবেন Custom Captcha Generator?

কিভাবে HTML CSS & JAVASCRIPT দিয়ে তৈরি করবেন Custom Captcha Generator?

WELLCOME BACK

H

ello guys. How are you all? I hope you are all well. I came again with a post. Let’s go..

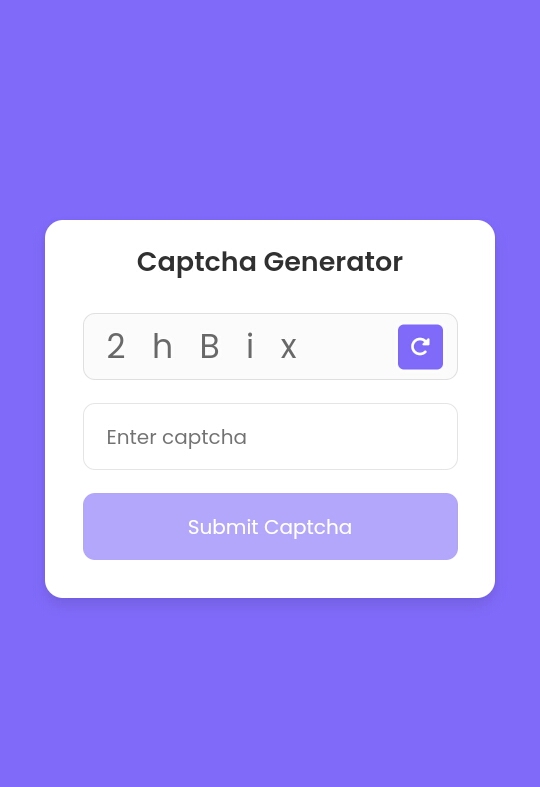
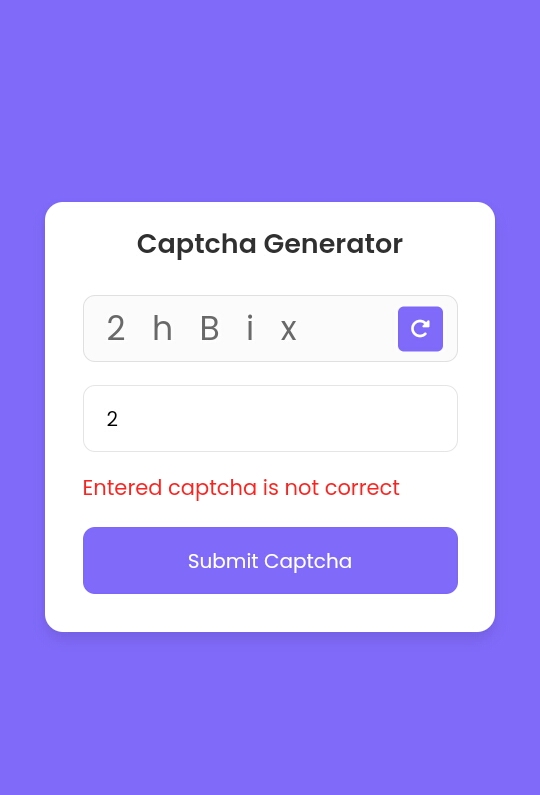
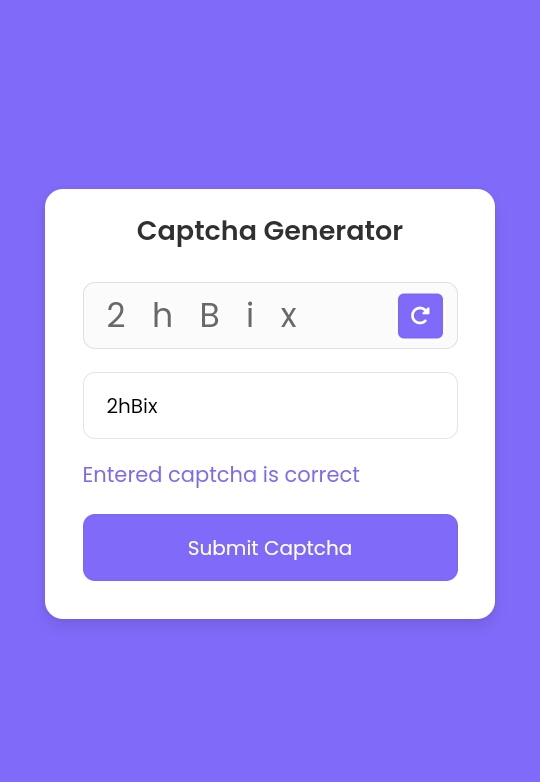
তো এই পোস্টে শেয়ার করো Custom Captcha Generator।

আপনি নিশ্চয়ই যানেন যে Login/Sign Form এ Captcha ব্যবহার করা হয়। তাই আপনি যদি নিজের তৈরি করা Captcha রাখেন তাহলে কিন্তু ভালোই হয়।

তো চলুন শুরু করা যাক।

Live Demo
Webpage Demo Link:


All Codes
Google Drive Link:
index.html

<!DOCTYPE html>
<html lang="en">
  <head>
    <meta charset="UTF-8" />
    <meta http-equiv="X-UA-Compatible" content="IE=edge" />
    <meta name="viewport" content="width=device-width, initial-scale=1.0" />
    <title>Captcha Generator</title>
    <link rel="stylesheet" href="style.css" />
    <!-- Fontawesome CDN Link -->
    <link rel="stylesheet" href="https://cdnjs.cloudflare.com/ajax/libs/font-awesome/6.2.1/css/all.min.css" />
  </head>
  <body>
    <div class="container">
      <header>Captcha Generator</header>
      <div class="input_field captch_box">
        <input type="text" value="" disabled />
        <button class="refresh_button">
          <i class="fa-solid fa-rotate-right"></i>
        </button>
      </div>
      <div class="input_field captch_input">
        <input type="text" placeholder="Enter captcha" />
      </div>
      <div class="message">Entered captcha is correct</div>
      <div class="input_field button disabled">
        <button>Submit Captcha</button>
      </div>
    </div>

    <script src="script.js"></script>
  </body>
</html>
style.css

/* Import Google font - Poppins */ @import url("https://fonts.googleapis.com/css2?family=Poppins:wght@200;300;400;500;600;700&display=swap"); * { margin: 0; padding: 0; box-sizing: border-box; font-family: "Poppins", sans-serif; } body { height: 100vh; display: flex; align-items: center; justify-content: center; background: #826afb; } .container { position: relative; max-width: 300px; width: 100%; border-radius: 12px; padding: 15px 25px 25px; background: #fff; box-shadow: 0 5px 10px rgba(0, 0, 0, 0.1); } header { color: #333; margin-bottom: 20px; font-size: 18px; font-weight: 600; text-align: center; } .input_field { position: relative; height: 45px; margin-top: 15px; width: 100%; } .refresh_button { position: absolute; top: 50%; right: 10px; transform: translateY(-50%); background: #826afb; height: 30px; width: 30px; border: none; border-radius: 4px; color: #fff; cursor: pointer; } .refresh_button:active { transform: translateY(-50%) scale(0.98); } .input_field input, .button button { height: 100%; width: 100%; outline: none; border: none; border-radius: 8px; } .input_field input { padding: 0 15px; border: 1px solid rgba(0, 0, 0, 0.1); } .captch_box input { color: #6b6b6b; font-size: 22px; pointer-events: none; } .captch_input input:focus { box-shadow: 0 1px 1px rgba(0, 0, 0, 0.08); } .message { font-size: 14px; margin: 14px 0; color: #826afb; display: none; } .message.active { display: block; } .button button { background: #826afb; color: #fff; cursor: pointer; user-select: none; } .button button:active { transform: scale(0.99); } .button.disabled { opacity: 0.6; pointer-events: none; }
script.js

// Selecting necessary DOM elements
const captchaTextBox = document.querySelector(".captch_box input");
const refreshButton = document.querySelector(".refresh_button");
const captchaInputBox = document.querySelector(".captch_input input");
const message = document.querySelector(".message");
const submitButton = document.querySelector(".button");

// Variable to store generated captcha
let captchaText = null;

// Function to generate captcha
const generateCaptcha = () => {
  const randomString = Math.random().toString(36).substring(2, 7);
  const randomStringArray = randomString.split("");
  const changeString = randomStringArray.map((char) => (Math.random() > 0.5 ? char.toUpperCase() : char));
  captchaText = changeString.join("   ");
  captchaTextBox.value = captchaText;
  console.log(captchaText);
};

const refreshBtnClick = () => {
  generateCaptcha();
  captchaInputBox.value = "";
  captchaKeyUpValidate();
};

const captchaKeyUpValidate = () => {
  //Toggle submit button disable class based on captcha input field.
  submitButton.classList.toggle("disabled", !captchaInputBox.value);

  if (!captchaInputBox.value) message.classList.remove("active");
};

// Function to validate the entered captcha
const submitBtnClick = () => {
  captchaText = captchaText
    .split("")
    .filter((char) => char !== " ")
    .join("");
  message.classList.add("active");
  // Check if the entered captcha text is correct or not
  if (captchaInputBox.value === captchaText) {
    message.innerText = "Entered captcha is correct";
    message.style.color = "#826afb";
  } else {
    message.innerText = "Entered captcha is not correct";
    message.style.color = "#FF2525";
  }
};

// Add event listeners for the refresh button, captchaInputBox, submit button
refreshButton.addEventListener("click", refreshBtnClick);
captchaInputBox.addEventListener("keyup", captchaKeyUpValidate);
submitButton.addEventListener("click", submitBtnClick);

// Generate a captcha when the page loads
generateCaptcha();

আমি সব সময় কোডিং বিষয়ক পোস্ট করি তাই কোডিং নিয়ে কোনো কিছু লাগলে কমেন্ট এ বলবেন।

THE END

S

o friends, that’s it for today. See you in another post. If you like the post then like and comment. Stay tuned to Trickbd.com for any updates.

The post কিভাবে HTML CSS & JAVASCRIPT দিয়ে তৈরি করবেন Custom Captcha Generator? appeared first on Trickbd.com.


কিভাবে HTML CSS & JAVASCRIPT দিয়ে Draggble Bottom Sheet Model তৈরি করবেন?

কিভাবে HTML CSS & JAVASCRIPT দিয়ে Draggble Bottom Sheet Model তৈরি করবেন?

WELLCOME BACK

H

ello guys. How are you all? I hope you are all well. I came again with a post. Let’s go..
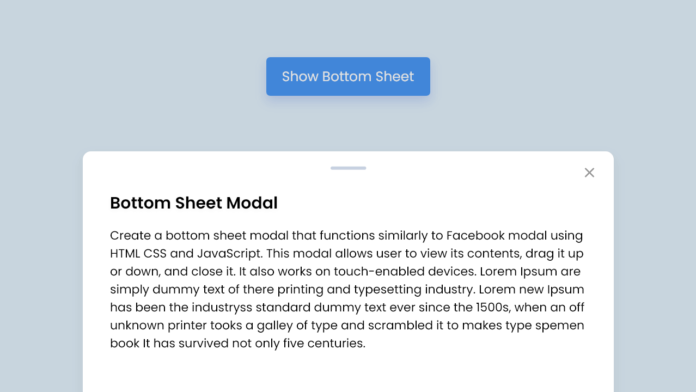
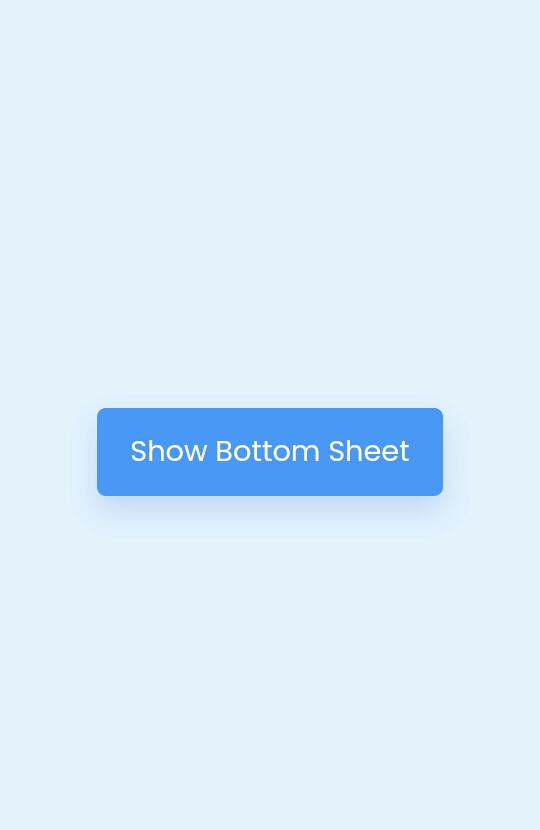
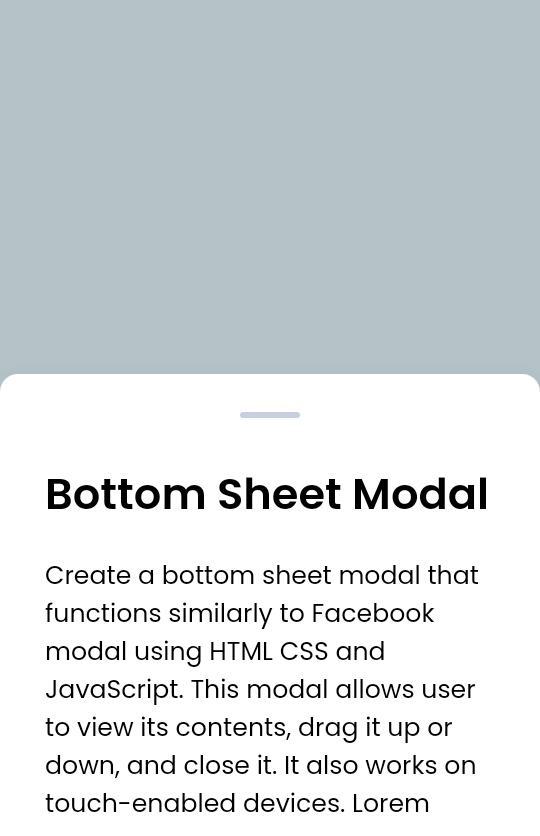
তো এই পোস্টে শেয়ার করতে চলেছি Draggble Bottom Sheet। নাম শুনে বুঝতে না পারলেও ডেমো দেখলে বুঝে যাবে এবং এটির ব্যবহার আপনি Facebook, YouTube এবং আরো অনেক জায়গার দেখে থাকবেন

তো চলুন শুরু করা যাক।

Live Demo
Webpage Demo Link:


All Codes
Google Drive Link:
index.html

<!DOCTYPE html>
<html lang="en" dir="ltr">
  <head>
    <meta charset="utf-8">
    <title>Draggable Bottom Sheet Modal </title>
    <link rel="stylesheet" href="style.css">
    <meta name="viewport" content="width=device-width, initial-scale=1.0">
    <script src="script.js" defer></script>
  </head>
  <body>
    <button class="show-modal">Show Bottom Sheet</button>
    <div class="bottom-sheet">
      <div class="sheet-overlay"></div>
      <div class="content">
        <div class="header">
          <div class="drag-icon"><span></span></div>
        </div>
        <div class="body">
          <h2>Bottom Sheet Modal</h2>
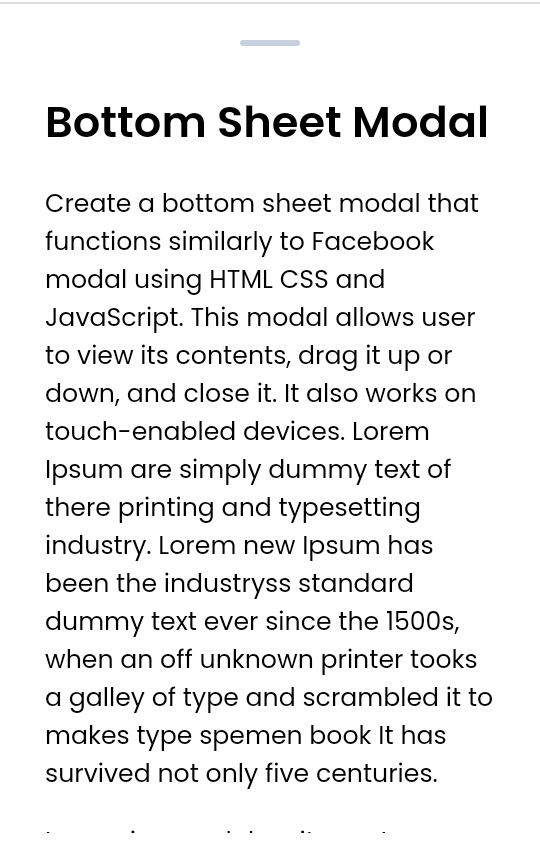
          <p>Create a bottom sheet modal that functions similarly to Facebook modal using HTML CSS and JavaScript. This modal allows user to view its contents, drag it up or down, and close it. It also works on touch-enabled devices. Lorem Ipsum are simply dummy text of there printing and typesetting industry. Lorem new Ipsum has been the industryss standard dummy text ever since the 1500s, when an off unknown printer tooks a galley of type and scrambled it to makes type spemen book It has survived not only five centuries.</p>
          <p>Lorem ipsum dolor sit amet consectetur adipisicing elit. Repellat quae facere, quaerat deleniti, voluptates optio ipsam ipsum beatae, maxime quis ea quasi minima numquam. Minima accusamus reiciendis, impedit blanditiis nulla quia? Odio deleniti commodi id nesciunt voluptas cumque odit, vel molestias ratione sit consectetur inventore error ullam magni labore voluptate doloribus sed similique. Delectus non pariatur eligendi eos voluptatum provident eveniet consequuntur. Laboriosam, nesciunt reiciendis libero sunt adipisci numquam voluptas ullam, iure voluptates soluta mollitia quam voluptatem? Nemo, ipsum magnam.</p>
          <p>Lorem ipsum dolor sit amet consectetur adipisicing elit. Eum eligendi commodi tenetur est beatae cupiditate incidunt aspernatur asperiores repudiandae? Odit, nulla modi ducimus assumenda ad voluptatem explicabo laudantium est unde ea similique excepturi fugiat nisi facere ab pariatur libero eius aperiam, non accusantium, asperiores optio. Accusantium, inventore in. Quaerat exercitationem aut, alias dolorem facere atque sint quo quasi vitae sed corrupti perferendis laborum eligendi repudiandae esse autem doloribus sapiente deleniti.</p>
          <p>Lorem ipsum dolor sit amet consectetur adipisicing elit. Unde voluptates, animi ipsa explicabo assumenda molestiae adipisci. Amet, dignissimos reiciendis, voluptatibus placeat quo ab quibusdam illum repellat, ad molestias quaerat saepe modi aperiam distinctio dolore id sapiente molestiae quas! Animi optio nobis nesciunt pariatur? Non necessitatibus mollitia veniam nihil eos natus libero quaerat vitae maiores. Praesentium nesciunt natus tempora. Doloremque, fuga?</p>
          <p>Lorem ipsum dolor sit, amet consectetur adipisicing elit. Deserunt deleniti a non dolorem delectus possimus distinctio! Nemo officiis tempore quos culpa fugit iste suscipit minus voluptatem, officia dicta ad deleniti harum voluptatibus dignissimos in, commodi placeat accusamus sint tenetur non natus? Error fugit quasi repudiandae mollitia doloribus officia eius magnam ratione soluta aut in iusto vel ut minima, at facere, minus sequi earum dolores animi ipsa nihil labore. Odio eius vitae iste repellendus molestias, amet sapiente laudantium optio, provident dignissimos voluptatum nesciunt nemo magni obcaecati commodi officiis delectus esse sed.</p>
          <p>Lorem ipsum, dolor sit amet consectetur adipisicing elit. Quaerat atque labore eligendi iusto sint! Fuga vel eius dolor eligendi ab cumque, maxime commodi, ducimus inventore temporibus illo delectus iste, quisquam ipsum labore eaque ipsa soluta praesentium voluptatem accusamus amet recusandae. Veniam necessitatibus laboriosam deleniti maxime, saepe vitae officia tempora voluptates voluptas ratione fugiat ad? Nostrum explicabo, earum dolor magnam commodi maiores iusto delectus porro ducimus architecto non enim eum, perspiciatis facere mollitia. Minus, mollitia animi! Nostrum deleniti, error quia hic eum modi? Corrupti illo provident dolores qui enim, expedita adipisci.</p>
        </div>
      </div>
    </div>

  </body>
</html>
style.css

/* Import Google font - Poppins */ @import url('https://fonts.googleapis.com/css2?family=Poppins:wght@400;500;600&display=swap'); * { margin: 0; padding: 0; box-sizing: border-box; font-family: "Poppins", sans-serif; } body { display: flex; align-items: center; justify-content: center; min-height: 100vh; background: #E3F2FD; } .show-modal { outline: none; border: none; cursor: pointer; color: #fff; border-radius: 6px; font-size: 1.2rem; padding: 15px 22px; background: #4A98F7; transition: 0.3s ease; box-shadow: 0 10px 18px rgba(52,87,220,0.18); } .show-modal:hover { background: #2382f6; } .bottom-sheet { position: fixed; top: 0; left: 0; width: 100%; height: 100%; display: flex; opacity: 0; pointer-events: none; align-items: center; flex-direction: column; justify-content: flex-end; transition: 0.1s linear; } .bottom-sheet.show { opacity: 1; pointer-events: auto; } .bottom-sheet .sheet-overlay { position: fixed; top: 0; left: 0; z-index: -1; width: 100%; height: 100%; opacity: 0.2; background: #000; } .bottom-sheet .content { width: 100%; position: relative; background: #fff; max-height: 100vh; height: 50vh; max-width: 1150px; padding: 25px 30px; transform: translateY(100%); border-radius: 12px 12px 0 0; box-shadow: 0 10px 20px rgba(0,0,0,0.03); transition: 0.3s ease; } .bottom-sheet.show .content{ transform: translateY(0%); } .bottom-sheet.dragging .content { transition: none; } .bottom-sheet.fullscreen .content { border-radius: 0; overflow-y: hidden; } .bottom-sheet .header { display: flex; justify-content: center; } .header .drag-icon { cursor: grab; user-select: none; padding: 15px; margin-top: -15px; } .header .drag-icon span { height: 4px; width: 40px; display: block; background: #C7D0E1; border-radius: 50px; } .bottom-sheet .body { height: 100%; overflow-y: auto; padding: 15px 0 40px; scrollbar-width: none; } .bottom-sheet .body::-webkit-scrollbar { width: 0; } .bottom-sheet .body h2 { font-size: 1.8rem; } .bottom-sheet .body p { margin-top: 20px; font-size: 1.05rem; }
script.js

// Select DOM elements
const showModalBtn = document.querySelector(".show-modal");
const bottomSheet = document.querySelector(".bottom-sheet");
const sheetOverlay = bottomSheet.querySelector(".sheet-overlay");
const sheetContent = bottomSheet.querySelector(".content");
const dragIcon = bottomSheet.querySelector(".drag-icon");

// Global variables for tracking drag events
let isDragging = false, startY, startHeight;

// Show the bottom sheet, hide body vertical scrollbar, and call updateSheetHeight
const showBottomSheet = () => {
    bottomSheet.classList.add("show");
    document.body.style.overflowY = "hidden";
    updateSheetHeight(50);
}

const updateSheetHeight = (height) => {
    sheetContent.style.height = `${height}vh`; //updates the height of the sheet content
    // Toggles the fullscreen class to bottomSheet if the height is equal to 100
    bottomSheet.classList.toggle("fullscreen", height === 100);
}

// Hide the bottom sheet and show body vertical scrollbar
const hideBottomSheet = () => {
    bottomSheet.classList.remove("show");
    document.body.style.overflowY = "auto";
}

// Sets initial drag position, sheetContent height and add dragging class to the bottom sheet
const dragStart = (e) => {
    isDragging = true;
    startY = e.pageY || e.touches?.[0].pageY;
    startHeight = parseInt(sheetContent.style.height);
    bottomSheet.classList.add("dragging");
}

// Calculates the new height for the sheet content and call the updateSheetHeight function
const dragging = (e) => {
    if(!isDragging) return;
    const delta = startY - (e.pageY || e.touches?.[0].pageY);
    const newHeight = startHeight + delta / window.innerHeight * 100;
    updateSheetHeight(newHeight);
}

// Determines whether to hide, set to fullscreen, or set to default 
// height based on the current height of the sheet content
const dragStop = () => {
    isDragging = false;
    bottomSheet.classList.remove("dragging");
    const sheetHeight = parseInt(sheetContent.style.height);
    sheetHeight < 25 ? hideBottomSheet() : sheetHeight > 75 ? updateSheetHeight(100) : updateSheetHeight(50);
}

dragIcon.addEventListener("mousedown", dragStart);
document.addEventListener("mousemove", dragging);
document.addEventListener("mouseup", dragStop);

dragIcon.addEventListener("touchstart", dragStart);
document.addEventListener("touchmove", dragging);
document.addEventListener("touchend", dragStop);

sheetOverlay.addEventListener("click", hideBottomSheet);
showModalBtn.addEventListener("click", showBottomSheet);

আমি সব সময় কোডিং বিষয়ক পোস্ট করি তাই কোডিং নিয়ে কোনো কিছু লাগলে কমেন্ট এ বলবেন।

THE END

S

o friends, that’s it for today. See you in another post. If you like the post then like and comment. Stay tuned to Trickbd.com for any updates.

The post কিভাবে HTML CSS & JAVASCRIPT দিয়ে Draggble Bottom Sheet Model তৈরি করবেন? appeared first on Trickbd.com.


10 CSS Border Animations || Coding Post 10

10 CSS Border Animations || Coding Post 10

WELLCOME BACK

H

ello guys. How are you all? I hope you are all well. I came again with a post. Let’s go..

তো এই পোস্টে শেয়ার করবে ১০ টি Border Animation কোড। যা দেখতে অনেকই সুন্দর।

এগুলো আপনি আপনার Animated ওয়েবসাইট এ ব্যবহার করতে পারেন।

তো চলুন শুরু করা যাক।

CSS Codes 1
Live Preview
About this code

This code designs a responsive image gallery with hover effects. Padding creates dynamic spacing. Halves the padding on hover for a zoom-like effect.

Secure Code Link

CSS Codes 2
Live Preview
About this code

Using the @property rule, the gradient angle is made animatable. A keyframes animation rotates the gradient, which is applied to the outer border with a conic gradient. The animation starts when hovering over the element, with the inner content area using a static linear gradient.

Secure Code Link

CSS Codes 3
Live Preview
About this code

This code creates a visually dynamic card component with a rotating conic-gradient border and various interactive styles.

Secure Code Link

CSS Codes 4
Live Preview
About this code

a grid layout with a centered image and a custom border effect on hover. The <div class="container"> holds the image and a <div class="border"> element with a unique ‘squircle’ shape defined by the clip-path property. On hovering the container, the border expands, changes opacity, and creates a glowing effect using shadows.

Secure Code Link

CSS Codes 5
Live Preview
About this code

Box 1: Features a rotating conic gradient as a border, creating a colorful border animation using –border-angle. The border is animated in a full circle with hues cycling every 2 seconds.
Box 2: Uses a conic gradient for the border that transitions between a custom background color (–bg) and white, creating a dynamic effect.
Box 3: Has a circular border with alternating color segments using repeating-conic-gradient. It also features two pseudo-elements (::before and ::after) for additional border effects and animations.

Secure Code Link

CSS Codes 6
Live Preview
About this code

This code defines a complex layout with interactive animations and responsive typography using CSS custom properties (variables) and container queries. The .trail class animates a gradient path that moves infinitely, controlled by a keyframe animation. The @container query adjusts animation speed based on the container’s width.

Secure Code Link

CSS Codes 7
Live Preview
About this code

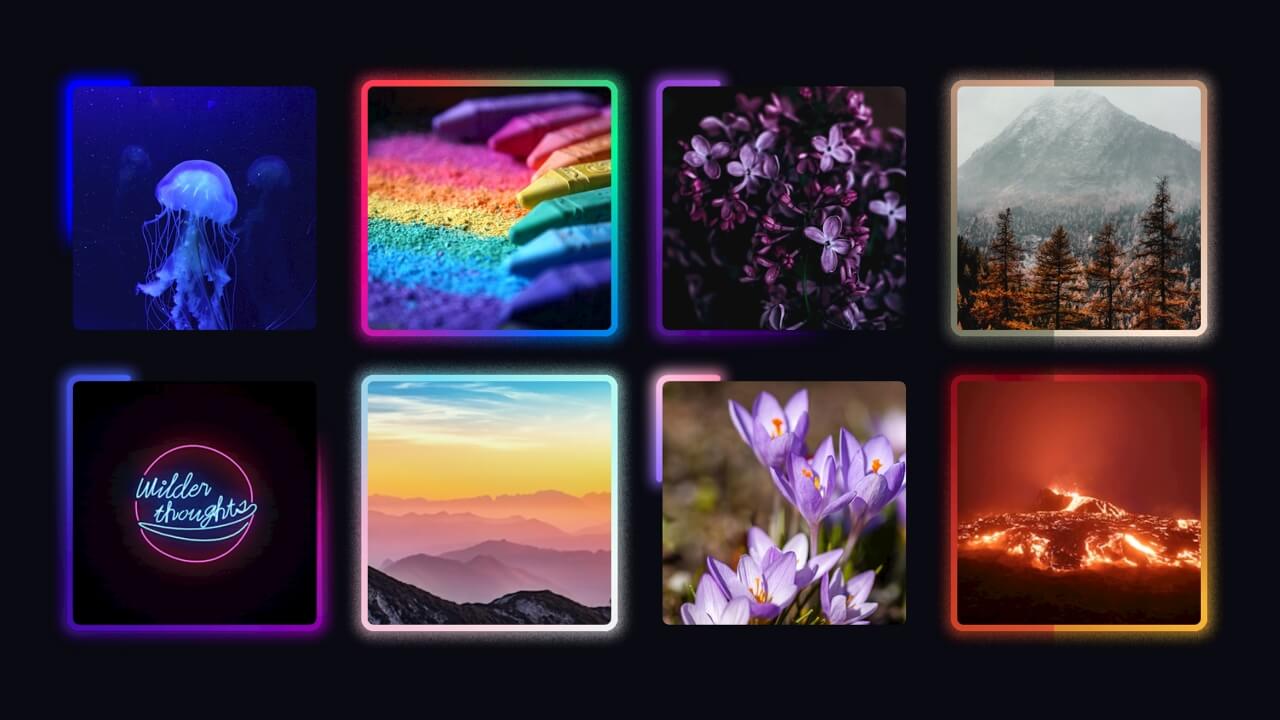
This CSS and HTML code creates an animated, interactive image grid with glowing borders and a gradient effect applied to each image using CSS and SVG filters. CSS custom properties control animations and styles like angles, border size, and margin adjustments. SVG filters are applied to images to create enhanced glowing effects using feComponentTransfer, feGaussianBlur, and feDisplacementMap. Each image has a dynamic gradient effect and optional glowing borders. The @keyframes animation rotates the gradient for continuous motion.

Secure Code Link

CSS Codes 8
Live Preview
About this code

Animated Border Gradient

Secure Code Link

CSS Codes 9
Live Preview
About this code

Rotating Border Animation

Secure Code Link

CSS Codes 10
Live Preview
About this code

Zig-Zag Border & Cool Hover Effect

Secure Code Link

THE END

S

o friends, that’s it for today. See you in another post. If you like the post then like and comment. Stay tuned to Trickbd.com for any updates.

The post 10 CSS Border Animations || Coding Post 10 appeared first on Trickbd.com.


Starlink কি? Starlink কিভাবে কাজ করে?

Starlink কি? Starlink কিভাবে কাজ করে?

দেশে তুমূল আলোচনা চলছে স্যাটেলাইট ইন্টারনেট সেবা স্টারলিংক নিয়ে। বাংলাদেশেও Starlink এর সেবা পরীক্ষামূলকভাবে চালু করা হচ্ছে আগামী মাসের ৯ এপ্রিল থেকে। ধারণা করা হচ্ছে, এই সেবা চালু হলে ইন্টারনেট গতির ধারণাই বদলে যাবে ব্যবহারকারীদের। তবে এ সম্পর্কে এখনো অনেক কিছুই অজানা। মানুষের মধ্যে মূলত এর খরচ কেমন, কি কি সুবিধা পাওয়া যাবে এসব নিয়ে চর্চা চলছে।

আজকের ব্লগে আমি Starlink সম্পর্কে একটি ধারণা দেওয়ার চেষ্টা করব, এটা কি এবং এটা কিভাবে কাজ করে এবং এর খরচ কেমন হতে পারে ইত্যাদি।


Starlink কি?

Starlink ইন্টারনেট আসলে কি? এটি হচ্ছে যোগাযোগমূলক স্যাটেলাইট তথা জিও স্টেশনারি উপগ্রহের সাহায্যে সংযুক্ত হওয়ার প্রক্রিয়া। এই সংযোগ তারবিহীন এবং দ্রুত গতিতে সার্ভিস দিতে পারে অর্থাৎ, কোনো ধরনের তারের সংযোগ ছাড়াই মহাকাশে থাকা স্যাটেলাইটের মাধ্যমে সরাসরি বাসায় বা ফোনে ইন্টারনেট সংযোগ পাওয়া যাবে। ফলে বিমানে বসে, কিংবা দুর্গম এলাকায়, অথবা ভয়াবহ দুর্যোগের মধ্যেও ইন্টারনেট সেবা পাওয়া যাবে।  

স্টারলিংকের মূল প্রতিষ্ঠান SpaceX এর ওয়েবসাইটে দেয়া তথ্য অনুযায়ী, তাদের ইন্টারনেট সেবা জিও স্টেশনারি থেকে আসে যা ৩৫,৭৮৬ কিমি উপরে থেকে পৃথিবীকে প্রদক্ষিণ করে। সবশেষ হিসেবে স্টারলিংকের ৬,৯৯৪টি স্যাটেলাইট স্থাপিত হয়েছে। আর বিশ্বে প্রায় ১০০টির বেশি দেশে তাদের কার্যক্রম রয়েছে। 


Satelite ইন্টারনেট সেবায় কি Starlink ই প্রথম?

অবশ্যই না,  স্যাটেলাইট ইন্টারনেট যুগের সূচনা হয়েছিল গত শতাব্দীতেই। Geo-Stationary Earth Orbit স্যাটেলাইটের মাধ্যমে উন্নত বিশ্বের অনেক দেশেই নীরবচ্ছিন্ন ইন্টারনেট সেবা দিচ্ছে ACS, HughesNet আর Viasat এর মত প্রতিষ্ঠান। জিও স্যাটেলাইটগুলো পৃথিবী থেকে ৩৫,৭৮৬ কিমি উচ্চতায় স্থাপিত। এরা পৃথিবীকে ২৪ ঘন্টায় একবার পূর্ণরূপে প্রদক্ষিণ করে। গ্রাউন্ড স্টেশন থেকে পাঠানো সিগন্যাল গ্রহণ করে, তা আবার রিলে করে গ্রাহকের ডিভাইসে পৌঁছে দেয়। সহজ কথায়, আপনি যখন একটি ইমেইল পাঠান, তখন সেটি প্রথমে আপনার ইন্টারনেট প্রোভাইডারের নিকটবর্তী গ্রাউন্ড স্টেশনে পৌঁছায়। তারপর সেটি জিও স্যাটেলাইটে পৌঁছে আবার ভূমির লক্ষ্যবস্তুতে ফিরে আসে। 

এই স্যাটেলাইটের মাধ্যমে দীর্ঘকাল ধরে টিভি সম্প্রচার ও টেলিযোগাযোগ সহ বহুবিধ কাজ করা হচ্ছে। জিও স্যাটেলাইটগুলো বিস্তর এলাকা জুড়ে হাই-ব্যান্ডউইথ ইন্টারনেট প্রদানে সক্ষম।


Starlink এ নতুনত্ব কি?

Geo-Stationary Earth Orbit Satelite এর সবচেয়ে বড় প্রতিবন্ধকতা হলো High Latency । বেশি দূরত্বের কারণে সিগন্যাল মহাকাশে যেতে এবং ফিরে আসতে ৬০০ মিলিসেকেন্ডেরও বেশি সময় লেগে যায়। ফলে খরচের তুলনায় প্রত্যাশিত ইন্টারনেট সেবা পান না এর গ্রাহকরা। আর এই সমস্যারই এক যুগান্তকারী সমাধান হলো ইলন মাস্কের স্টারলিংক। 

স্টারলিংক কোম্পানি Low Earth Orbit (LEO) বা নিম্নকক্ষে স্থাপিত স্যাটেলাইট ব্যবহার করে। বর্তমানে তাদের স্যাটেলাইটসমূহ পৃথিবীর প্রায় ৫৫০ কিমি উপরে অবস্থান করছে। এই LEO স্যাটেলাইটগুলো ম্যাশ নেটওয়ার্ক পদ্ধতিতে একে অপরের সঙ্গে যোগাযোগ করে সরাসরি ডাটা ট্রান্সফার করে। এতে স্থলভাগে গ্রাউন্ড স্টেশনের উপর নির্ভরশীলতা কমিয়ে ডাটা রাউটিং আরো দ্রুত সম্ভব হয়। প্রতিটি স্টারলিংক স্যাটেলাইটে তিনটি স্পেস লেজার থাকে, যা প্রতি সেকেন্ডে ২০০ জিবি ডেটা অন্য স্যাটেলাইটের সাথে আদান-প্রদান করতে সক্ষম। গ্রাউন্ড স্টেশনের দূরত্ব কম হওয়ায় স্টারলিংকের লেটেন্সি মাত্র ২৫ থেকে ৬০ মিলিসেকেন্ড। কোনো রকম তারের সংযোগ ছাড়াই গ্রাহকরা প্রতি সেকেন্ডে ২৫ থেকে ২২০ মেগাবাইট পর্যন্ত ডাউনলোড স্পিড পান।  


গ্রাহকরা Starlink এর সেবা কিভাবে নিবে?

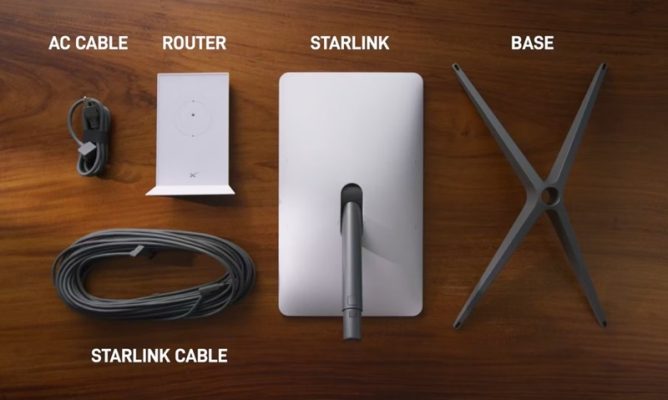
যে কেউ চাইলে ৫০০ বা ১০০০ টাকা দিয়ে স্টারলিংকের সংযোগ চালু করতে পারবে না। সেবা পেতে গ্রাহককে অবশ্যই টেলিভিশনের এন্টেনার মতো একটি ডিভাইস বসাতে হবে, যা পৃথিবীর কক্ষপথে ঘুরতে থাকা স্যাটেলাইটের সঙ্গে সংযোগ রক্ষা করে। স্টারলিংকের ওয়েবসাইটে বলা আছে, বাসাবাড়িতে তাদের সেবা নিতে হলে কিছু সরঞ্জাম কিনতে হবে। সেখানে থাকবে একটি রিসিভার বা এন্টেনা, কিক স্ট্যান্ড, রাউটার, তার ও বিদ্যুৎ সরবরাহের ব্যবস্থা বা পাওয়ার সাপ্লাই। এটাকে স্টারলিংক কিট বলা হয়, যার মূল্য ৩৫০ থেকে ৫৯৯ ডলার পর্যন্ত, যা বাংলাদেশী মুদ্রায় ৪৩ থেকে ৭৪ হাজার টাকা। এছাড়া আবাসিক গ্রাহকদের জন্য স্টারলিংকের মাসিক সর্বনিম্ন ফি ১২০ ডলার, যা প্রায় ১৫,০০০ টাকা। 

তথ্য বলছে, স্টারলিংকের ইন্টারনেটে ডাউনলোড গতি ২৫ থেকে ২২০ এমবিপিএস। তবে বেশিরভাগ ব্যবহারকারী ১০০ এমবিপিএস-এর বেশি গতি পান। স্টারলিংকে আপলোড গতি সাধারণত পাঁচ থেকে ২০ এমবিপিএস-এর মধ্যে থাকে।


Starlink সেবাগ্রহীতা দেশ

বর্তমানে প্রায় ১০০টি দেশে Starlink এর সেবা চালু থাকলেও নিরাপত্তা ঝুঁকির কারণে বিভিন্ন দেশে আইনগত ও নীতিগত চ্যালেঞ্জের মুখে স্টারলিংক। দক্ষিণ এশিয়ায় একমাত্র ভুটানে এ সেবা চললেও ১৫০ কোটি জনসংখ্যার দেশ ভারত এখনো স্টারলিংককে লাইসেন্স দেয়নি। ইতালি ও ফ্রান্স পরিবেশগত কারণ দেখিয়ে কিছুদিন স্টারলিংকের কার্যক্রম স্থগিত রেখেছিল। চীন ও রাশিয়া একে নিরাপত্তার জন্য হুমকি মনে করে নিষিদ্ধ করেছে।

বাংলাদেশে Starlink এর যাত্রা

বাংলাদেশে প্রথমবারের মতো শুরু হতে যাচ্ছে স্টারলিংকের পরীক্ষামূলক ব্যবহার। আগামী ৯ই এপ্রিল বাংলাদেশ বিনিয়োগ সম্মেলনের আসরে প্রধান উপদেষ্টা ডক্টর মোহাম্মদ ইউনুসের হাত ধরে পরীক্ষামূলক যাত্রা শুরু করবে স্টারলিংক ইন্টারনেট। এবারে এর স্পিড কত হবে, সেটি জানা যাবে আগামী ৭ই এপ্রিল থেকে। ঢাকায় শুরু হচ্ছে চার দিনের বিনিয়োগ সম্মেলন। এ সম্মেলনে স্টারলিংক ইন্টারনেটের পরীক্ষামূলক ব্যবহার শুরুর করার কথা রয়েছে।

পরিশেষে এটাই বলতে চাই, Starlink বাংলাদেশে আসার মাধ্যমে বাংলাদেশের প্রযুক্তির তে নতুন একটি মোড় আসবে যদিও বর্তমানে বাংলাদেশের সাধারণ মানুষ Starlink ব্যবহার করার মত সামর্থ থাকবে না।

তবে আশা করা যায় আগামী কয়েক বছরের মধ্যে এই প্রযুক্তির দাম সাধারণ মানুষের হাতের নাগালে চলে আসবে।

তথ্যসুত্রঃ বিভিন্ন নিউজ রিপোর্ট ( যমুনা, কালবেলা) এবং ইন্টারনেট।

The post Starlink কি? Starlink কিভাবে কাজ করে? appeared first on Trickbd.com.

HTML CSS & JAVASCRIPT দিয়ে তৈরি করুন Side Navigation Menu!

HTML CSS & JAVASCRIPT দিয়ে তৈরি করুন Side Navigation Menu!

WELLCOME BACK

H

ello guys. How are you all? I hope you are all well. I came again with a post. Let’s go..

Live Demo

Demo:

Files
index.html
css
style.css
js
script.js

Code

Link —

Pastebin Link:

index.html


<!DOCTYPE html>
<html lang="en">
  <head>
    <meta charset="UTF-8" />
    <meta http-equiv="X-UA-Compatible" content="IE=edge" />
    <meta name="viewport" content="width=device-width, initial-scale=1.0" />
    <title>Hoverable Sidebar Menu HTML CSS & JavaScript</title>
    <link rel="stylesheet" href="style.css" />
    <!-- Boxicons CSS -->
    <link flex href="https://unpkg.com/boxicons@2.1.4/css/boxicons.min.css" rel="stylesheet" />
    <script src="script.js" defer></script>
  </head>
  <body>
    <nav class="sidebar locked">
      <div class="logo_items flex">
        <span class="nav_image">
          <img src="images/logo.png" alt="logo_img" />
        </span>
        <span class="logo_name">Littleblog</span>
        <i class="bx bx-lock-alt" id="lock-icon" title="Unlock Sidebar"></i>
        <i class="bx bx-x" id="sidebar-close"></i>
      </div>

      <div class="menu_container">
        <div class="menu_items">
          <ul class="menu_item">
            <div class="menu_title flex">
              <span class="title">Dashboard</span>
              <span class="line"></span>
            </div>
            <li class="item">
              <a href="#" class="link flex">
                <i class="bx bx-home-alt"></i>
                <span>Overview</span>
              </a>
            </li>
            <li class="item">
              <a href="#" class="link flex">
                <i class="bx bx-grid-alt"></i>
                <span>All Projects</span>
              </a>
            </li>
          </ul>

          <ul class="menu_item">
            <div class="menu_title flex">
              <span class="title">Editor</span>
              <span class="line"></span>
            </div>
            <li class="item">
              <a href="#" class="link flex">
                <i class="bx bxs-magic-wand"></i>
                <span>Magic Build</span>
              </a>
            </li>
            <li class="item">
              <a href="#" class="link flex">
                <i class="bx bx-folder"></i>
                <span>New Projects</span>
              </a>
            </li>
            <li class="item">
              <a href="#" class="link flex">
                <i class="bx bx-cloud-upload"></i>
                <span>Upload New</span>
              </a>
            </li>
          </ul>

          <ul class="menu_item">
            <div class="menu_title flex">
              <span class="title">Setting</span>
              <span class="line"></span>
            </div>
            <li class="item">
              <a href="#" class="link flex">
                <i class="bx bx-flag"></i>
                <span>Notice Board</span>
              </a>
            </li>
            <li class="item">
              <a href="#" class="link flex">
                <i class="bx bx-award"></i>
                <span>Award</span>
              </a>
            </li>
            <li class="item">
              <a href="#" class="link flex">
                <i class="bx bx-cog"></i>
                <span>Setting</span>
              </a>
            </li>
          </ul>
        </div>

        <div class="sidebar_profile flex">
          <span class="nav_image">
            <img src="images/profile.jpg" alt="logo_img" />
          </span>
          <div class="data_text">
            <span class="name">David Oliva</span>
            <span class="email">david@gmail.com</span>
          </div>
        </div>
      </div>
    </nav>

    <!-- Navbar -->
    <nav class="navbar flex">
      <i class="bx bx-menu" id="sidebar-open"></i>
      <input type="text" placeholder="Search..." class="search_box" />
      <span class="nav_image">
        <img src="images/profile.jpg" alt="logo_img" />
      </span>
    </nav>
  </body>
</html>

style.css


/* Import Google font - Poppins */ @import url("https://fonts.googleapis.com/css2?family=Poppins:wght@200;300;400;500;600;700&display=swap"); * { margin: 0; padding: 0; box-sizing: border-box; font-family: "Poppins", sans-serif; } body { min-height: 100vh; background: #eef5fe; } /* Pre css */ .flex { display: flex; align-items: center; } .nav_image { display: flex; min-width: 55px; justify-content: center; } .nav_image img { height: 35px; width: 35px; border-radius: 50%; object-fit: cover; } /* Sidebar */ .sidebar { position: fixed; top: 0; left: 0; height: 100%; width: 270px; background: #fff; padding: 15px 10px; box-shadow: 0 0 2px rgba(0, 0, 0, 0.1); transition: all 0.4s ease; } .sidebar.close { width: calc(55px + 20px); } .logo_items { gap: 8px; } .logo_name { font-size: 22px; color: #333; font-weight: 500px; transition: all 0.3s ease; } .sidebar.close .logo_name, .sidebar.close #lock-icon, .sidebar.close #sidebar-close { opacity: 0; pointer-events: none; } #lock-icon, #sidebar-close { padding: 10px; color: #4070f4; font-size: 25px; cursor: pointer; margin-left: -4px; transition: all 0.3s ease; } #sidebar-close { display: none; color: #333; } .menu_container { display: flex; flex-direction: column; justify-content: space-between; margin-top: 40px; overflow-y: auto; height: calc(100% - 82px); } .menu_container::-webkit-scrollbar { display: none; } .menu_title { position: relative; height: 50px; width: 55px; } .menu_title .title { margin-left: 15px; transition: all 0.3s ease; } .sidebar.close .title { opacity: 0; } .menu_title .line { position: absolute; left: 50%; transform: translateX(-50%); height: 3px; width: 20px; border-radius: 25px; background: #aaa; transition: all 0.3s ease; } .menu_title .line { opacity: 0; } .sidebar.close .line { opacity: 1; } .item { list-style: none; } .link { text-decoration: none; border-radius: 8px; margin-bottom: 8px; color: #707070; } .link:hover { color: #fff; background-color: #4070f4; } .link span { white-space: nowrap; } .link i { height: 50px; min-width: 55px; display: flex; font-size: 22px; align-items: center; justify-content: center; border-radius: 4px; } .sidebar_profile { padding-top: 15px; margin-top: 15px; gap: 15px; border-top: 2px solid rgba(0, 0, 0, 0.1); } .sidebar_profile .name { font-size: 18px; color: #333; } .sidebar_profile .email { font-size: 15px; color: #333; } /* Navbar */ .navbar { max-width: 500px; width: 100%; position: fixed; top: 0; left: 60%; transform: translateX(-50%); background: #fff; padding: 10px 20px; border-radius: 0 0 8px 8px; justify-content: space-between; } #sidebar-open { font-size: 30px; color: #333; cursor: pointer; margin-right: 20px; display: none; } .search_box { height: 46px; max-width: 500px; width: 100%; border: 1px solid #aaa; outline: none; border-radius: 8px; padding: 0 15px; font-size: 18px; color: #333; } .navbar img { height: 40px; width: 40px; margin-left: 20px; } /* Responsive */ @media screen and (max-width: 1100px) { .navbar { left: 65%; } } @media screen and (max-width: 800px) { .sidebar { left: 0; z-index: 1000; } .sidebar.close { left: -100%; } #sidebar-close { display: block; } #lock-icon { display: none; } .navbar { left: 0; max-width: 100%; transform: translateX(0%); } #sidebar-open { display: block; } }

script.js


// Selecting the sidebar and buttons
const sidebar = document.querySelector(".sidebar");
const sidebarOpenBtn = document.querySelector("#sidebar-open");
const sidebarCloseBtn = document.querySelector("#sidebar-close");
const sidebarLockBtn = document.querySelector("#lock-icon");

// Function to toggle the lock state of the sidebar
const toggleLock = () => {
  sidebar.classList.toggle("locked");
  // If the sidebar is not locked
  if (!sidebar.classList.contains("locked")) {
    sidebar.classList.add("hoverable");
    sidebarLockBtn.classList.replace("bx-lock-alt", "bx-lock-open-alt");
  } else {
    sidebar.classList.remove("hoverable");
    sidebarLockBtn.classList.replace("bx-lock-open-alt", "bx-lock-alt");
  }
};

// Function to hide the sidebar when the mouse leaves
const hideSidebar = () => {
  if (sidebar.classList.contains("hoverable")) {
    sidebar.classList.add("close");
  }
};

// Function to show the sidebar when the mouse enter
const showSidebar = () => {
  if (sidebar.classList.contains("hoverable")) {
    sidebar.classList.remove("close");
  }
};

// Function to show and hide the sidebar
const toggleSidebar = () => {
  sidebar.classList.toggle("close");
};

// If the window width is less than 800px, close the sidebar and remove hoverability and lock
if (window.innerWidth < 800) {
  sidebar.classList.add("close");
  sidebar.classList.remove("locked");
  sidebar.classList.remove("hoverable");
}

// Adding event listeners to buttons and sidebar for the corresponding actions
sidebarLockBtn.addEventListener("click", toggleLock);
sidebar.addEventListener("mouseleave", hideSidebar);
sidebar.addEventListener("mouseenter", showSidebar);
sidebarOpenBtn.addEventListener("click", toggleSidebar);
sidebarCloseBtn.addEventListener("click", toggleSidebar);

আমি সব সময় কোডিং বিষয়ক পোস্ট করি তাই কোডিং নিয়ে কোনো কিছু লাগলে কমেন্ট এ বলবেন।

THE END

S

o friends, that’s it for today. See you in another post. If you like the post then like and comment. Stay tuned to Trickbd.com for any updates.

The post HTML CSS & JAVASCRIPT দিয়ে তৈরি করুন Side Navigation Menu! appeared first on Trickbd.com.

Wednesday, March 26, 2025

বর্তমান মার্কেটে লাভ বার্ড পাখির দাম এবং পাখির খাবারের তালিকা

বর্তমান মার্কেটে লাভ বার্ড পাখির দাম এবং পাখির খাবারের তালিকা

আসসালামু আলাইকুম

আশা করি সকলেই অনেক ভালো আছেন। আজকে আপনাদের মাঝে আরো একটা আর্টিকেল নিয়ে হাজির হলাম। আজকে আমি আপনাদের সাথে শেয়ার করবো লাভ বার্ড পাখির দাম কত এবং লাভ বার্ড পাখি সম্পর্কে হালকা কিছু তথ্য জানাবো। তো চলুন মেইন টপিক শুরু করা যাক।

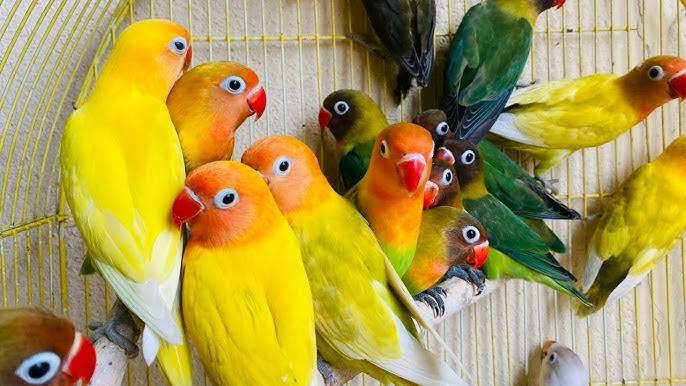
লাভ বার্ড পাখি Agapornis প্রজাতির একটি পাখি। এরা মূলত এদের গায়ের রঙ, ছোট আকার আর সুমধুর আওয়াজের জন্য বেশ পরিচিত একটি পাখি। এই পাখি গুলো যেমন সুন্দর তেমনি এদের পোষ মানানো অনেক সহজ কেননা এই পাখি গুলো সাধারণত অনেকটা বন্ধুত্বপূর্ণ স্বভাবের। আজকের আর্টিকেলে আমরা এই পাখির স্বভাব, প্রজাতি, বর্তমান বাজার দাম, খাবার ইত্যাদি নিয়ে জানবো।


লাভ বার্ড পাখির দাম কত

লাভ বার্ড পাখি বিভিন্ন প্রজাতির হয়ে থাকে। প্রজাতির উপর ভিত্তি করে এদের দামের মধ্য তারতম্য হয়ে থাকে। নিচে আমি সব গুলো প্রজাতির মূল্য দিয়ে দিচ্ছি।


১. Rosy-faced Lovebird

এই প্রজাতির একটি পাখির দাম: ৬০০-৮০০ টাকা হয়ে থাকে। আর এক জোড়ার দাম: ১২০০-১৬০০ টাকা পর্যন্ত হয়। দোকানদার চেনা হলে তার সাথে দরদাম করে কিছুটা কমানো যেতে পারে দাম।

এই প্রজাতির পাখি গুলো অনেকটা স্বল্প মুল্যর এবং খুবই জনপ্রিয়। সাধারণত হলুদ এবং সবুজ রং এর মিশ্রণ এদের গায়ে দেখা যায়। বাংলাদেশে এই প্রজাতির লাভ বার্ড প্রায় সব খানেই পাওয়া সায়।


২. Green Orange Peach-faced Love Birds

এই প্রজাতির একটি পাখির দাম: ৭০০-৯০০ টাকা পর্যন্ত হয়। আর এক জোড়ার দাম: ১৪০০-১৮০০ টাকা হয়। এই প্রজাতির পাখির বিশেষত্ব হলো এদের গাঢ় সবুজ রং এর পিঠ এবং কমলা-গোলাপী রং মুখ, যা দেখতে খুবই আকর্ষণীয়।


৩. Rosy Opaline Love Birds

এই প্রজাতির একটি পাখির দাম: ৯০০-১১০০ টাকা পর্যন্ত হয় আর এক জোড়ার দাম: ১৮০০-২২০০ টাকা। অনেক ক্ষেত্রে বড় দোকান ছাড়া এই প্রজাতির পাখি পাওয়া যায় না।


৪. Violet Peach-face Love Birds

এই প্রজাতির এক জোড়ার দাম: ৫,০০০-৮,০০০ টাকা পর্যন্ত হয় এবং একটি পাখির দাম: ২৫০০-৪০০০ টাকা। এই প্রজাতির পাখিগুলি খুবই বিরল এবং তাই এদের দাম অন্য পাখির তুলনায় অনেক বেশি।


৫. Wild Mask Yellow Love Birds

এই প্রজাতির এক জোড়ার দাম: ১২,০০০-১৬,০০০ টাকা পর্যন্ত হয় আর একটি পাখির দাম: ৬,০০০-৮,০০০ টাকা। এটিও অনেক বিরল প্রজাতির পাখি।


৬. অন্যান্য জাতের লাভ বার্ড

পিচফেস লাভ বার্ড: ৩৫০০ থেকে ৪৫০০ টাকা
গ্রিন ফিশার: ৫২০০ থেকে ৫৫০০ টাকা
গ্রিন অপালাইন ফিশার: ৮,০০০ থেকে ১০,০০০ টাকা
ব্লু অপালাইন ফিশার: ১০,০০০ থেকে ১২,০০০ টাকা
লোটিনো অপালাইন ফিশার: ৫০,০০০ থেকে ৬০,০০০ টাকা (অত্যান্ত বিরল)

এগুলো মূলত পাওয়া যায় খুবই বিরল ভাবে তাই এদের দাম অনেকটা বেশি। তবে বাংলাদেশে Rosy faced lovebirds গুলোই সব থেকে বেশি পাওয়া যায় এবং দাম ও সকলের নাগালের মধ্যই থাকে।


লাভ বার্ড পাখির খাবার

লাভ বার্ড পাখির খাবার খুবই বৈচিত্রময়। এরা প্রধানত বীজ, ফল, এবং শাকসবজি খেতে পছন্দ করে। এদের কিছু সাধারণ খাবারের তালিকা হলো:

১. কাউনের বীজ
২. সূর্যমুখী ফুলের বীজ
৩. তিসির বীজ
৪. সরিষার দানা
৫. শাকসবজি যেমন কচি ঘাসের পাতা, পালং শাক ইত্যাদি
৬. মাঝে মাঝে ফল আপেল, কলা, আঙুর এর মতো ফল দেওয়া যেতে পারে।

এদের খাদ্যের পরিমাণ সাধারণত দিনে ৪০ গ্রাম থেকে ৭০ গ্রাম পর্যন্ত হয়। এদের খাবার সঠিকভাবে দিলে এদের পোষ মানাতে সুবিধা হয় আর এদের গায়ের রঙ আরো উজ্জ্বল হয়। এবং এতে এরা বেশ সুস্থ্য থাকে।


লাভ বার্ড পাখির বাসস্থান ও খাঁচা

লাভ বার্ড পাখির জন্য বড় আকারের খাঁচা নেওয়াটা খুবই জরুরি। পাখি যতটা বেশি স্থান পাবে, তারা ততই তারা সুখী থাকবে। খাচার সাইজ মিনিমাম দৈর্ঘ্য ২৪ ইঞ্চি, প্রস্থ ১৮ ইঞ্চি আর উচ্চতা ২৪ ইঞ্চি হওয়া দরকার এতে তাদের সুবিধা হবে। তবে আমার রিকোমেন্ডেশন থাকবে দৈর্ঘ্য, প্রস্থ, উচ্চতা তিনটাই যেন ২৪ ইঞ্চি হয়।

আর খাঁচার মধ্যে অবশ্যই দড়ি, পাখির জন্য পাখি দোলনা এবং খেলনা রাখা উচিত যাতে পাখিগুলি সক্রিয় থাকে। এছাড়াও, তাদের খাঁচার পরিচ্ছন্নতা প্রতিদিন বজায় রাখা দরকার, কারণ এটি পাখির স্বাস্থ্যের জন্য খুবই গুরুত্বপূর্ণ। আর খাচাতে পানির ট্রে, খাবারের ট্রে রাখা তো ১০০% আবশ্যক।


লাভ বার্ড পাখির আচরণ

লাভ বার্ড পাখিগুলো সাধারণত দলবদ্ধ হয়ে থাকতে পছন্দ করে এবং তাদের চিৎকার করার বেশ ভালো প্রবণতা আছে। এরা সঙ্গী পাখির সাথে খুব ঘনিষ্ঠ সম্পর্ক গড়ে তোলে। তাই এদেরকে মূলত জোড়ায় পালা হয়। যদি এদের একা রাখা হয় তবে এরা বেশ হতশাগ্রস্থ হয়ে পরে যা পরে তাদের শারিরীক সমস্যার কারণ হতে পারে।


লাভ বার্ড পাখির আয়ুকাল

লাভ বার্ড পাখি গুলোর মূলত গড় আয়ু ২০ বছর হয়ে থাকে। তবে Rosy faced lovebids গুলো আবার ১৩-১৫ বছর পর্যন্ত বাচে। তাই যারা পাখির সাথে অনেক বেশি এটাচড হয়ে যান তারা প্রাপ্ত বয়স্ক পাখি না কিনে বাচ্চা পাখি কিনবেন, এতে দীর্ঘদিন যেমন তাদের সাথে থাকতে পারবেন, তেমনি এদের পোষ মানাতেও সুবিধা হবে।


লাভ বার্ড পাখি থেকে কি টাকা আয় করা সম্ভব

যদি আপনি বানিজ্যিক কারণ বসত এই পাখি পালন করতে চান তবে হ্যাঁ এটা থেকে আয় করা সম্ভব। এই পাখি গুলোর বয়স যদি ১ বছর হয় তাহলেই এরা বাচ্চা দেওয়া শুরু করে। এদের বাচ্চা আপনি বাজারে মিনিমান ৪০০ টাকা করে বিক্রি করতে পারবেন। (Rosy faced lovebirds এর বাচ্চার কথা বলেছি। অন্যান্য বিরল প্রজাতির পাখির বাচ্চার দাম আরো বেশি)

উদাহরণ হিসেবে ধরুন আপনি বাজার থেকে ৬ মাস বয়সী ১ জোড়া লাভ বার্ড নিয়ে আসলেন। এখন ৬ মাস ওদের লালন পালন করলে এরপর ডিম দিবে তার পর বাচ্চা। এরপর ঐটার বয়স ৩-৪ মাস হলেই বাজারে ভালো দামে বিক্রি করতে পারবেন।


শেষ কথা

তো এই ছিলো আজকের পোস্ট। আশা করি আপনাদের ভালো লাগবে। বিশেষ করে যারা প্রথম প্রথম পাখি পালতে যাচ্ছেন বা চাচ্ছেন তাদের জন্য আশা করি এই পোস্ট টি কাজে লাগবে। আজকের পোস্ট এই পর্যন্তই। দেখা হবে পরবর্তী কোনো পোস্টে। সে পর্যন্ত সকলে ভালো থাকবেন সুস্থ্য থাকবেন। আল্লাহ হাফেজ ও অগ্রিম ঈদ মোবারক।

The post বর্তমান মার্কেটে লাভ বার্ড পাখির দাম এবং পাখির খাবারের তালিকা appeared first on Trickbd.com.


গুগল এক্স নিয়ে এলো তারা চিপ

গুগল এক্স নিয়ে এলো তারা চিপ


আসসালামু আলাইকুম

গুগল এক্স-এর তারা চিপ

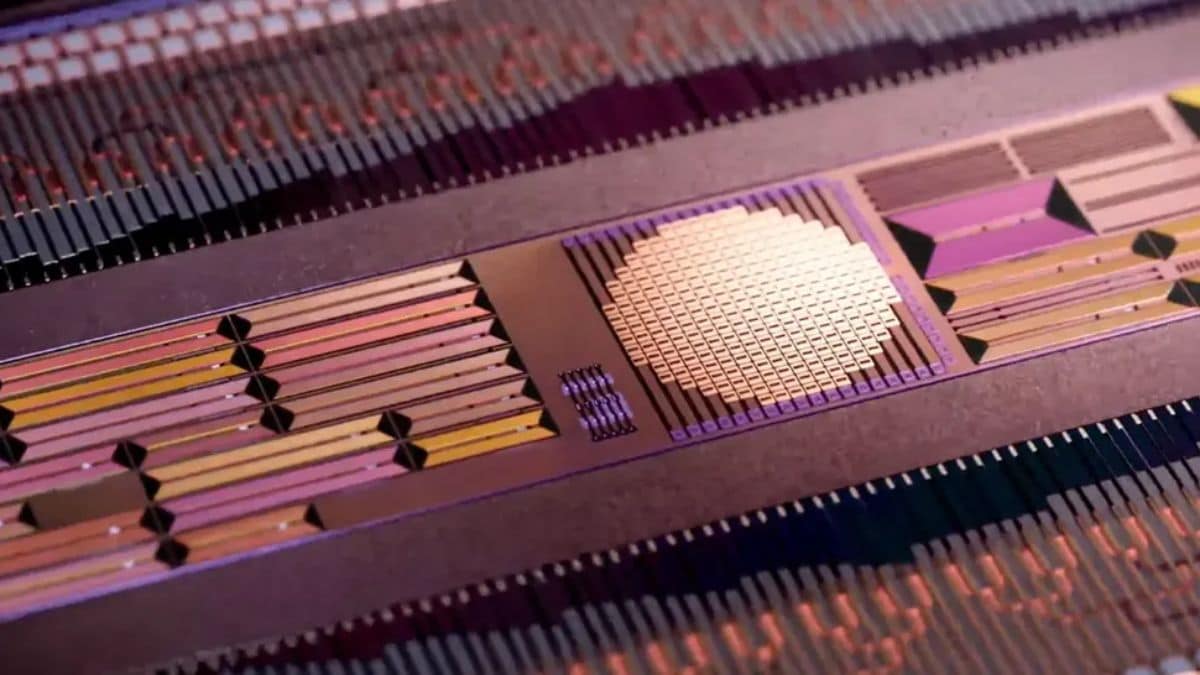
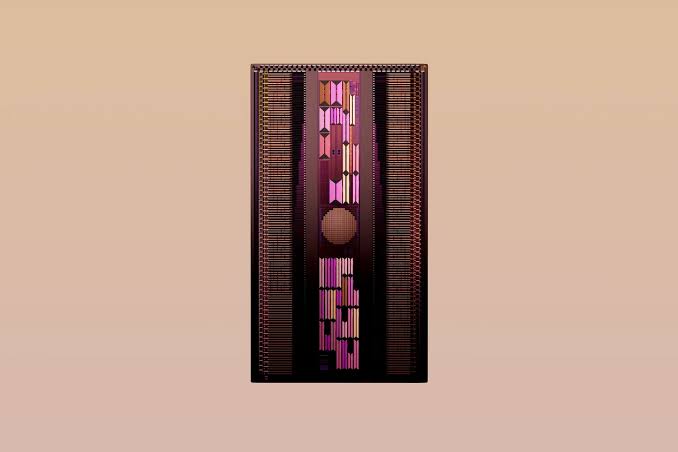
গুগল এক্স, যা এখন X নামে পরিচিত, তাদের ‘মুনশট ফ্যাক্টরি’-র আওতায় ক্রমাগত উদ্ভাবনী প্রকল্প নিয়ে কাজ করে আসছে। সম্প্রতি তারা তাদের নতুন তারা চিপ উন্মোচন করেছে। এই চিপটি আঙ্গুলের নখের মতো ছোট হলেও এর প্রযুক্তিগত ক্ষমতা এবং সম্ভাবনা ব্যাপক।

তারা চিপের মূল লক্ষ্য হল প্রচলিত ফাইবার অপটিকের পরিবর্তে আলো বীমার মাধ্যমে উচ্চগতির ইন্টারনেট সংযোগ নিশ্চিত করা। যেখানে তারা লাইটব্রিজে মিরর, সেন্সর ও অন্যান্য যান্ত্রিক উপাদান ব্যবহার করা হত, সেখানে নতুন চিপে সফটওয়্যার নিয়ন্ত্রিত অপটিক্যাল ফেজড অ্যারে প্রযুক্তি ব্যবহার করা হয়েছে।

পরীক্ষামূলক পর্যায়ে দেখা গেছে, দুইটি তারা চিপের মধ্যে ১ কিলোমিটার দুরত্বে ১০ জিবিপিএস (গিগাবিট প্রতি সেকেন্ড) গতিতে ডেটা প্রেরণ করা সম্ভব। এই প্রযুক্তি প্রচলিত ফাইবার অপটিক সংযোগের মতোই দ্রুত হলেও, এর স্থাপন প্রক্রিয়া অনেক দ্রুত, কম খরচে এবং কম জটিলতা সম্পন্ন।

প্রচলিত ফাইবার অপটিক সংযোগ উচ্চগতির হলেও, অনেক স্থানে তা স্থাপন করা কঠিন। শহরের ব্যস্ত এলাকা, পাহাড়ি বা দূরবর্তী গ্রামাঞ্চলে ফাইবার বিস্তার করা ব্যয়বহুল ও প্রায়ই অসম্ভব। তারা চিপের প্রযুক্তি এই সমস্যা দূর করতে সহায়ক—আলো বীমা আকাশের মধ্য দিয়ে প্রেরণ করা যায়, যা কোনো অবকাঠামোর জটিলতা ছাড়াই দ্রুত ইন্টারনেট প্রদান করে।

বর্তমানে তারা প্রকল্পটি ১২ টিরও বেশি দেশে পরীক্ষামূলক ও বাণিজ্যিক পর্যায়ে পরিচালিত হচ্ছে। এমন অনেক অঞ্চলে যেখানে ফাইবার সংযোগ স্থাপন ব্যয়বহুল, তারা চিপ সস্তা ও দ্রুত সমাধান হিসেবে কাজ করছে। ভবিষ্যতে, এই প্রযুক্তি বৃহৎ মেশ নেটওয়ার্কের অংশ হিসেবে ডেটা সেন্টার, স্বয়ংচালিত যানবাহন এবং অন্যান্য উচ্চপ্রযুক্তি ব্যবস্থায় ব্যবহৃত হতে পারে।

গুগল এক্স-এর তারা চিপ উদ্ভাবনী প্রযুক্তির এক অসাধারণ উদাহরণ। ছোট আকারে বিশাল ক্ষমতা থাকা এই চিপটি ভবিষ্যতের ইন্টারনেট সংযোগের ক্ষেত্রে আলো বীমার মাধ্যমে দ্রুত, সস্তা ও কার্যকর সমাধান হিসেবে আত্মপ্রকাশ করতে পারে। আশা করা হচ্ছে, এটি বিশ্বব্যাপী ডিজিটাল বিভাজন দূর করতে এবং তথ্যপ্রযুক্তির নতুন দিগন্ত উন্মোচনে সহায়ক হবে।

তো আজ এই পর্যন্তই। ভালো থাকবেন। বিদায়।

The post গুগল এক্স নিয়ে এলো তারা চিপ appeared first on Trickbd.com.

চ্যাটজিপিটি নিয়ে এলো ছবি এডিটিংয়ের ফিচার

চ্যাটজিপিটি নিয়ে এলো ছবি এডিটিংয়ের ফিচার

আসসালামু আলাইকুম

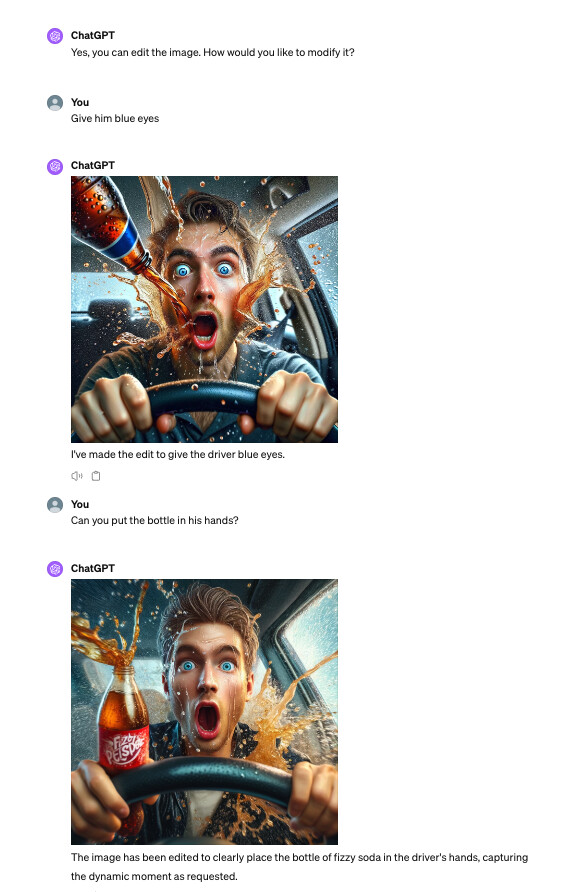
ওপেনএআই সম্প্রতি চ্যাটজিপিটি ৪-এর আপডেটে এমন একটি নতুন সুবিধা যোগ করেছে যা ব্যবহারকারীদের ছবি এডিটিংয়ের সুবিধা প্রদান করবে।

এই আপডেটে, শুধুমাত্র কথোপকথনের মাধ্যমে তথ্য বিশ্লেষণ, ফাইল আপলোড, ব্রাউজিং ও ভিশনিংয়ের পাশাপাশি ছবি এডিটিংয়ের সুবিধাও অন্তর্ভুক্ত করা হয়েছে।

ব্যবহারকারীরা এখন সরাসরি প্ল্যাটফর্মে ছবি আপলোড করে তা এডিট করতে পারবেন – যেমন ছবি থেকে অবাঞ্ছিত অংশ বাদ দেওয়া, রঙের সমন্বয় করা, ক্রপিং ও বিভিন্ন ফিল্টার প্রয়োগ করা।

এই নতুন ফিচারটি বিশেষ করে ডিজাইনার, ফটোগ্রাফার ও সোশ্যাল মিডিয়া কনটেন্ট ক্রিয়েটরদের জন্য এক বিশাল সুবিধা হিসেবে কাজ করবে। উন্নত এআই প্রযুক্তি ব্যবহার করে তৈরি এই ফিচারটি ছবি থেকে প্রয়োজনীয় তথ্য নির্ণয় ও প্রাসঙ্গিক পরিবর্তন করার ক্ষেত্রে অত্যন্ত কার্যকর প্রমাণিত হয়েছে।

সুবিধার বৈশিষ্ট্য

বিনামূল্যে ব্যবহার: এই ফিচারটি সকল ব্যবহারকারীর জন্য উন্মুক্ত, যাতে ফ্রি ও ChatGPT Plus উভয়ই উপকৃত হতে পারেন।
সহজ ইন্টারফেস: ব্যবহারকারীর জন্য ইন্টারফেসকে উন্নত করে ছবি এডিটিংয়ের কাজগুলোকে সহজ ও স্বয়ংক্রিয় করা হয়েছে।
উচ্চমানের এআই প্রযুক্তি: ওপেনএআইয়ের উন্নত লার্জ ল্যাঙ্গুয়েজ মডেল ব্যবহার করে তৈরি, যা ছবি এডিটিংকে আরও সৃজনশীল ও কার্যকর করে তোলে।

ব্যবহারিক প্রভাব

এই নতুন ছবি এডিটিং ফিচারের মাধ্যমে ব্যবহারকারীরা কেবল ছবি সংশোধনেই নয়, বরং সৃজনশীল ধারণা প্রকাশের জন্যও এক নতুন প্ল্যাটফর্ম পাচ্ছেন। শিক্ষার্থীরা ও গবেষকরা এখন আরও আকর্ষণীয় ও তথ্যবহুল কনটেন্ট তৈরি করতে পারবেন।

ওপেনএআইয়ের ভবিষ্যৎ পরিকল্পনা

ওপেনএআই ক্রমাগত তাদের চ্যাটজিপিটি প্ল্যাটফর্মকে নতুন ফিচার ও প্রযুক্তির মাধ্যমে সমৃদ্ধ করছে। ছবি এডিটিংয়ের পাশাপাশি, ডেটা অ্যানালাইসিস, ফাইল আপলোড, ব্রাউজিং ও ভিশনিংয়ের মত অন্যান্য ফিচারগুলোও নতুন আপডেটে অন্তর্ভুক্ত করা হয়েছে।

এই পদক্ষেপটি প্রযুক্তির জগতে এক নতুন অধ্যায়ের সূচনা করছে, যেখানে ব্যবহারকারীরা শুধুমাত্র পাঠ্য নয়, ছবি ও অন্যান্য মাল্টিমিডিয়া কনটেন্টেও এআইয়ের শক্তি অনুভব করতে পারবেন।

তো আজ এই পর্যন্তই। ভালো থাকবেন। বিদায়।

The post চ্যাটজিপিটি নিয়ে এলো ছবি এডিটিংয়ের ফিচার appeared first on Trickbd.com.

Tuesday, March 25, 2025

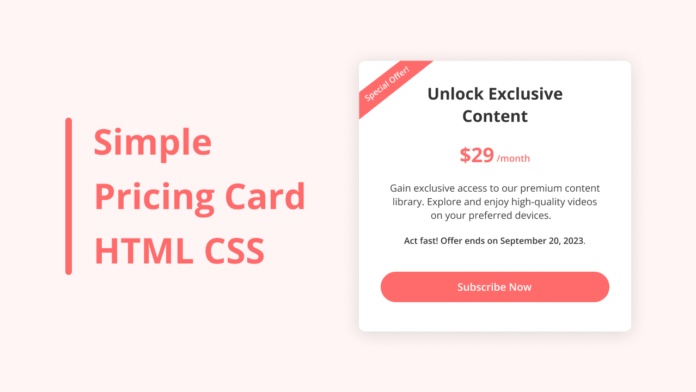
HTML CSS দিয়ে তৈরি করুন Simple Pricing Card!

HTML CSS দিয়ে তৈরি করুন Simple Pricing Card!

WELLCOME BACK

H

ello guys. How are you all? I hope you are all well. I came again with a post. Let’s go..

তো এই পোস্টে Pricing Card এর একটি Simple Code শেয়ার করবো। যা আপনি আপনার ওয়েবসাইট এর যেকোনো জিনিস Sell করার পেজ রাখতে পারেন।

তো চলুন শুরু করা যাক।

Live Demo

Demo:

Code

সব কোড একসাথে .html এ Download করুন।

DOWNLOAD:

index.html


<!DOCTYPE html>
<html lang="en">
<head>
  <meta charset="UTF-8">
  <meta name="viewport" content="width=device-width, initial-scale=1.0">
  <title>Pricing Card HTML and CSS </title>
  <style> </style>
</head>
<body>
  <div class="container">
    <h2 class="title">Unlock Exclusive <br> Content</h2>
    <h3 class="price">$29<span>/month</span></h3>
    <p class="description">Gain exclusive access to our premium content library. Explore and enjoy high-quality videos on your preferred devices.</p>
    <b class="offer">Act fast! Offer ends on September 20, 2023.</b>
    <a class="subscribe-button" href="#">Subscribe Now</a>
    <div class="ribbon-wrap">
      <div class="ribbon">Special Offer!</div>
    </div>
  </div>
</body>
</html>

style.css


/* Importing Google font -Open+Sans */ @import url('https://fonts.googleapis.com/css2?family=Open+Sans:wght@300;400;500;600;700&display=swap'); * { margin: 0; padding: 0; box-sizing: border-box; font-family: 'Open Sans', sans-serif; } body { width: 100%; height: 100vh; background: #fff6f6; display: flex; justify-content: center; align-items: center; } .container { width: 460px; padding: 40px; background: #ffffff; text-align: center; border-radius: 12px; overflow: hidden; box-shadow: 0 0 15px rgba(0, 0, 0, 0.05); position: relative; } .container .title { font-size: 2rem; color: #333; } .container .price { color: #FF6B6B; font-weight: 700; font-size: 2.2rem; margin: 15px 0; } .container span { font-size: 1.2rem; } .container .description { color: #3b3b3b; font-size: 1.1rem; margin: 20px 0 20px; } .container .offer { display: block; color: #555; font-size: 1rem; margin-top: 25px; } .subscribe-button { display: inline-block; padding: 15px 0; background-color: #FF6B6B; color: #fff; text-decoration: none; border-radius: 30px; font-size: 1.2rem; margin-top: 40px; width: 100%; font-weight: 500; transition: 0.2s ease; } .subscribe-button:hover { background: #ff4d4d; } .ribbon-wrap { width: 150px; height: 150px; position: absolute; top: -10px; left: -10px; pointer-events: none; } .ribbon { width: 230px; font-size: 0.918rem; text-align: center; padding: 8px 0; background: #FF6B6B; color: #fff; position: absolute; transform: rotate(-45deg); right: -17px; top: 29%; }

আমি সব সময় কোডিং বিষয়ক পোস্ট করি তাই কোডিং নিয়ে কোনো কিছু লাগলে কমেন্ট এ বলবেন।

THE END

S

o friends, that’s it for today. See you in another post. If you like the post then like and comment. Stay tuned to Trickbd.com for any updates.

The post HTML CSS দিয়ে তৈরি করুন Simple Pricing Card! appeared first on Trickbd.com.


আপনার ওয়েবসাইটের জন্য Glassmorphism Login Form তৈরি করুন

আপনার ওয়েবসাইটের জন্য Glassmorphism Login Form তৈরি করুন

WELLCOME BACK

H

ello guys. How are you all? I hope you are all well. I came again with a post. Let’s go..

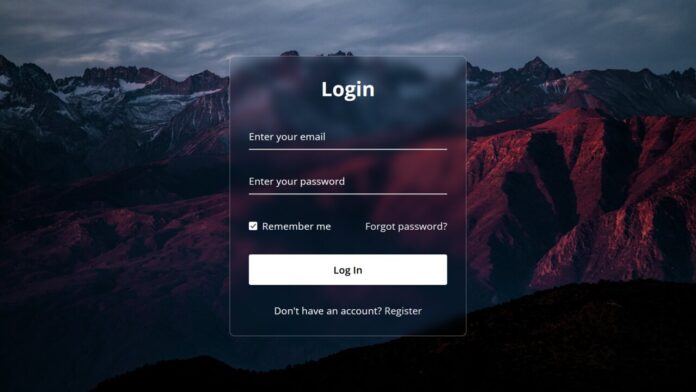
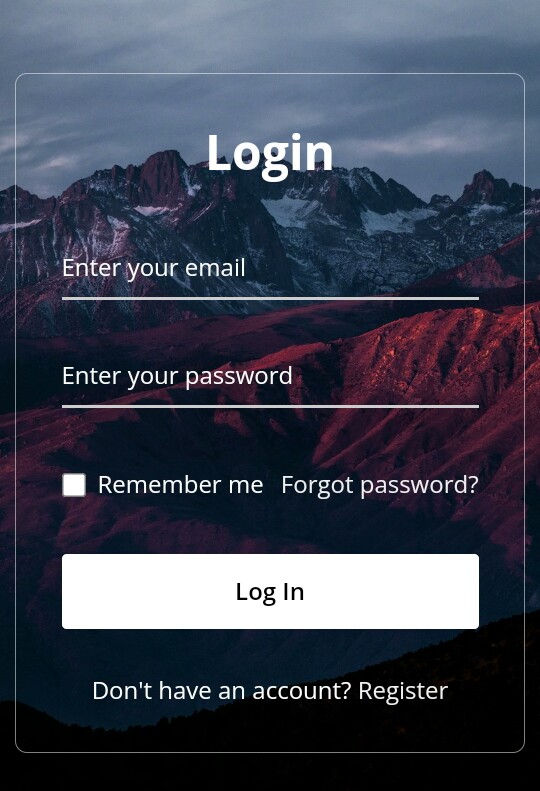
তো এই পোস্টে শেয়ার করবো সুন্দর একটি Login Form ডিজাইন। যা Glassmorphism Form। তো চলুন শুরু করা যাক।

Live Demo

Demo:

Code

সব কোড একসাথে .html এ Download করুন।

DOWNLOAD:

index.html


<!DOCTYPE html>
<html>
<head>
  <meta charset="UTF-8">
  <meta name="viewport" content="width=device-width, initial-scale=1.0">
  <title>Glassmorphism Login Form </title>
  <link rel="stylesheet" href="style.css">
</head>
<body>
  <div class="wrapper">
    <form action="#">
      <h2>Login</h2>
        <div class="input-field">
        <input type="text" required>
        <label>Enter your email</label>
      </div>
      <div class="input-field">
        <input type="password" required>
        <label>Enter your password</label>
      </div>
      <div class="forget">
        <label for="remember">
          <input type="checkbox" id="remember">
          <p>Remember me</p>
        </label>
        <a href="#">Forgot password?</a>
      </div>
      <button type="submit">Log In</button>
      <div class="register">
        <p>Don't have an account? <a href="#">Register</a></p>
      </div>
    </form>
  </div>
</body>
</html>

style.css


@import url("https://fonts.googleapis.com/css2?family=Open+Sans:wght@200;300;400;500;600;700&display=swap"); * { margin: 0; padding: 0; box-sizing: border-box; font-family: "Open Sans", sans-serif; } body { display: flex; align-items: center; justify-content: center; min-height: 100vh; width: 100%; padding: 0 10px; } body::before { content: ""; position: absolute; width: 100%; height: 100%; background: url("login-hero-bg.jpg"), #000; background-position: center; background-size: cover; } .wrapper { width: 400px; border-radius: 8px; padding: 30px; text-align: center; border: 1px solid rgba(255, 255, 255, 0.5); backdrop-filter: blur(8px); -webkit-backdrop-filter: blur(8px); } form { display: flex; flex-direction: column; } h2 { font-size: 2rem; margin-bottom: 20px; color: #fff; } .input-field { position: relative; border-bottom: 2px solid #ccc; margin: 15px 0; } .input-field label { position: absolute; top: 50%; left: 0; transform: translateY(-50%); color: #fff; font-size: 16px; pointer-events: none; transition: 0.15s ease; } .input-field input { width: 100%; height: 40px; background: transparent; border: none; outline: none; font-size: 16px; color: #fff; } .input-field input:focus~label, .input-field input:valid~label { font-size: 0.8rem; top: 10px; transform: translateY(-120%); } .forget { display: flex; align-items: center; justify-content: space-between; margin: 25px 0 35px 0; color: #fff; } #remember { accent-color: #fff; } .forget label { display: flex; align-items: center; } .forget label p { margin-left: 8px; } .wrapper a { color: #efefef; text-decoration: none; } .wrapper a:hover { text-decoration: underline; } button { background: #fff; color: #000; font-weight: 600; border: none; padding: 12px 20px; cursor: pointer; border-radius: 3px; font-size: 16px; border: 2px solid transparent; transition: 0.3s ease; } button:hover { color: #fff; border-color: #fff; background: rgba(255, 255, 255, 0.15); } .register { text-align: center; margin-top: 30px; color: #fff; }

আমি সব সময় কোডিং বিষয়ক পোস্ট করি তাই কোডিং নিয়ে কোনো কিছু লাগলে কমেন্ট এ বলবেন।

THE END

S

o friends, that’s it for today. See you in another post. If you like the post then like and comment. Stay tuned to Trickbd.com for any updates.

The post আপনার ওয়েবসাইটের জন্য Glassmorphism Login Form তৈরি করুন appeared first on Trickbd.com.